I've lived in Florida for quite some time now, and every year I've been on the
look out for better goggles, or better defog products. When the weather gets hot
and steamy, there is little to be done about fogging up, except regulate your
breathing and hope your anti-fog concoction holds out. I say concoction, because
there are dozens of "special formulas" available both commercially and privately
that claim to be the ultimate fog beaters. some have worked better than others,
but none are 100% effective in my experience.
The most effective solution, is to provide
air circulation inside your goggles. The vents cut into them just aren't
enough and in some cases will actually encourage fog to form. Remember,
fog is simply water vapor that is condensing on your lens. Just like a
car defroster, we want to use air circulation to evaporate that water
and exhaust it out of your mask. One small fan pulling air out of your
mask should create enough air to keep your lens clear in most
conditions, especially when combined with a good anti-fog lens or even a
no fog solution. having a clear mask keeps the game safe, and doesn't
spoil your day.
Jt Racing aka JT paintball aka JT USA and maybe other names, sold and
still sells a "vortex" goggle fan for their spectra and other goggles that is a
great design and has been around since the 90's. Later editions have a two
position switch which let you choose which direction you want the fan to go, a
neat trick and very effective design. Unfortunately, the JT fan works best with
JT goggles, and though you can make them work with other brands, they don't work
nearly as well and you have to modify the goggle frames to make them fit.
Modifying the goggle frame may render them unsafe, and that's the last thing we
want to do.
There are several other fans available commercially and they are awesome, one
even senses humidity in your mask and turns on automatically! But they are
expensive, expensive as in over $50.00 as much or more than a good set of
goggles! My solution? make your own, and you can do it for under $20.00!
I'm going to insert the standard disclosure here, if your not comfortable with
this project, don't do it. It can involve high heat, chemicals and other
potentially dangerous stuff. Don't blame me if you mess something up or burn a
hole through your hand into your moms favorite table cloth her long gone great aunty
Gerty
left her... In this case, go buy a FANZ kit or something that's pre-assembled.
On the other hand, doing it yourself is fun for many and you get
bragging rights!
For my project I wanted to outfit a Vforce Profiler, and a Vforce Shield, but
this will apply to most other goggle brands as well.
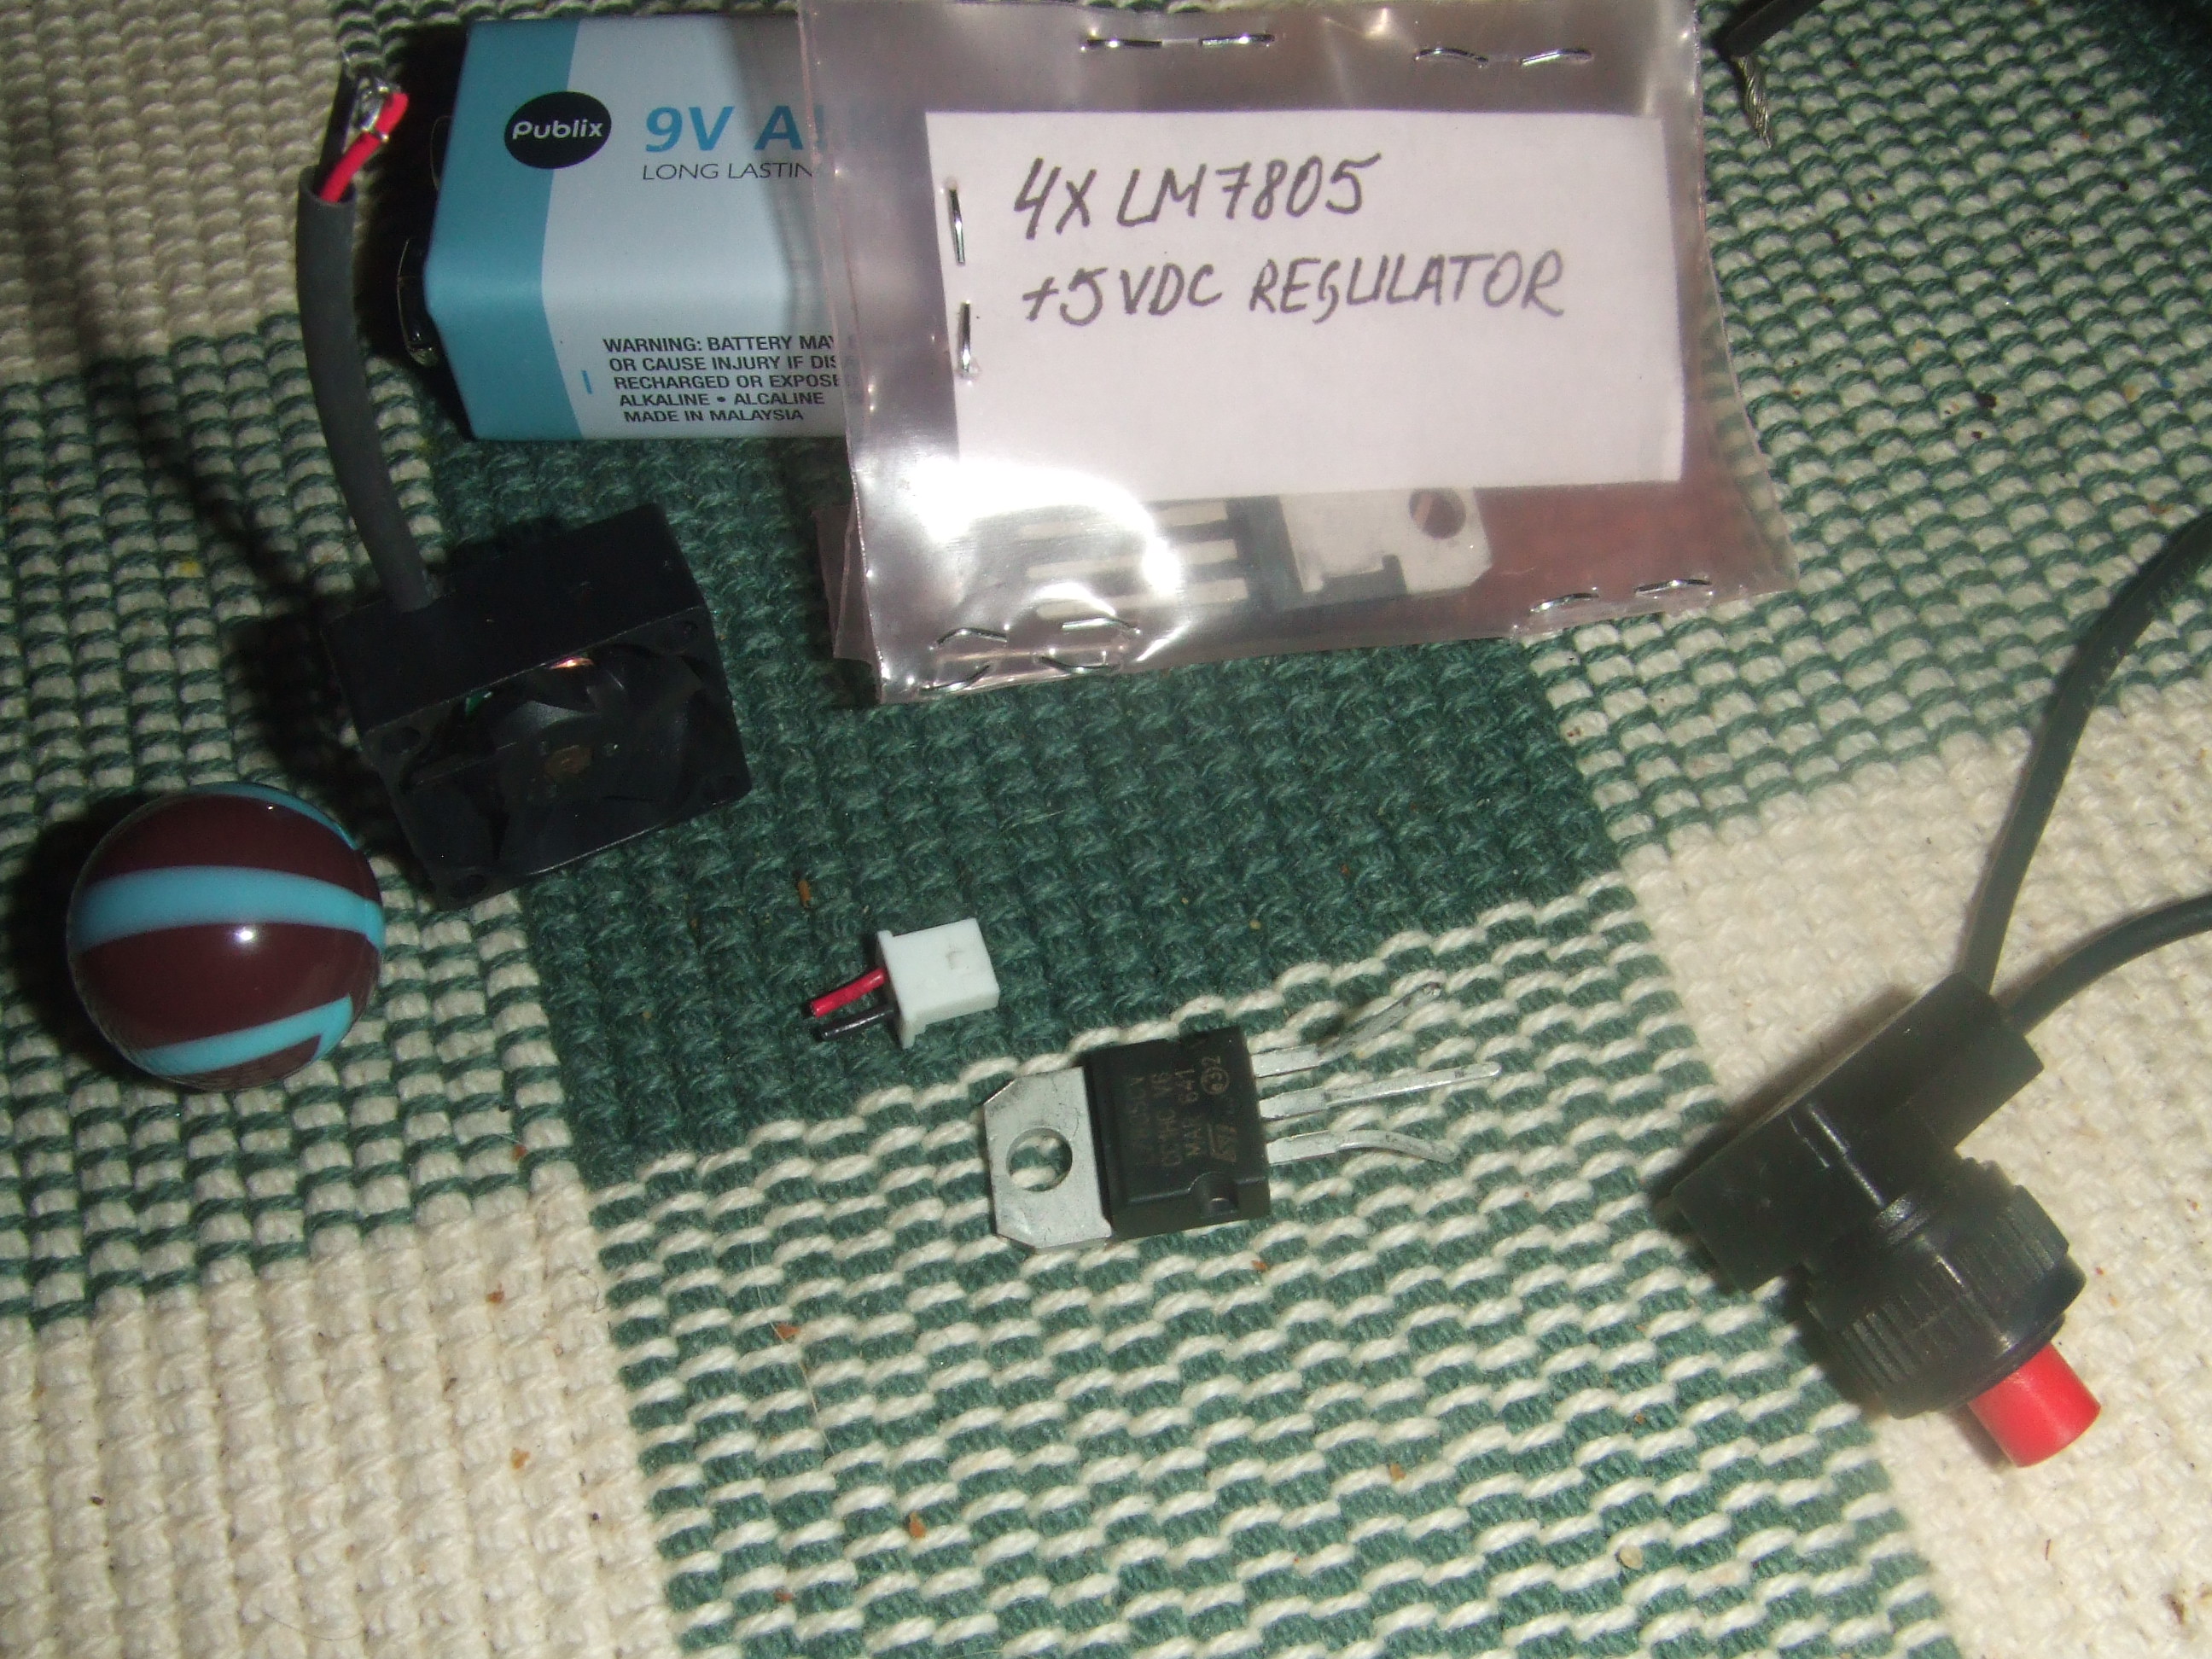
Parts needed:
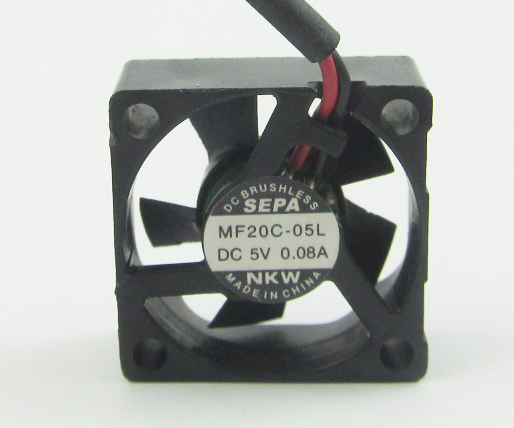
Small fan(s:) There are several different micro fans available, they
range in size and price. for my project, I needed SMALL fans, they are usually
sold in metric sizes, 30mm x 30mm might have worked, but I was able to find a
pair of two 20mm x 20mm x 8mm high 5 volt fans on ebay for $13.50 (for two)
including shipping. 20mm is about 3/4 inch and the perfect size for our
purposes, its only slightly larger than a paintball!
Voltage regulator: Since the fans I selected were designed for computer
applications, they required 5v dc to operate. They will run off 9v dc but that's
pushing it and decreasing both the fan and the battery life. A voltage regulator
will take power greater than its output, and reduce it to the rated
voltage, basically a better version of the resistor. To make sure the
the fans only get their required 5 volts, I purchased 5v dc voltage regulators.
These were about $3.24 for four of them or less than 82 cents each and you can
find them at radio shack or online.
9volt battery connector: these are often sold in packs of ten for under $2.00 i
have several left over from another project and it cost me nothing.
Some wire to connect everything, 16 or 18 gauge stranded wire works best, again,
I had this laying around but you can buy small rolls at Radio shack for a few
bucks, or just ask any mechanic or electrician for some scrap wire.
Something to hold a 9v battery to your mask or goggle strap. you can buy a
casing for this , or you can just use some elastic with Velcro, or use old bread
bag ties like i did.
a 9v battery, please do not take it from your smoke detector.
a switch, the smaller the better but not so small as you cant activate it with
your paintball gloves on. Again, I salvaged mine from and old broken radar
detector, but you can buy them at radio shack for a few bucks.
Tools & misc.:
wire cutter/stripper
soldiering iron (please educate yourself on soldiering before starting)
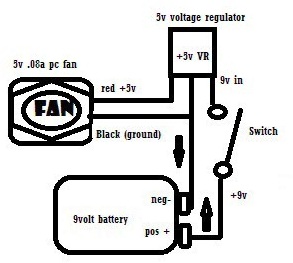
Please keep in mind that this is a very basic diagram, and all connection points
should be soldiered together. If you cant use a soldiering iron, there are "solderless"
and "cold" solder options available as well.
As you can see from the diagram, the 9v power flows out of the battery, through
the switch, into the voltage regulator where it is reduced to 5 volts, then into
the fan. The ground circuit runs from the negative battery terminal, into the
common ground of the voltage regulator and into the fan. I would not make
any permanent connection until the placement of the components in the mask is
decided. Since this is a "one way" circuit, you must also decide if you want the
fan to exhaust, or blow into the goggles. I highly recommend using the fan as an
exhaust, or using two fans , one as an intake and as an exhaust.
** the single fan can be expanded to a two fan system by simply adding a second
fan and 5v regulator after the power switch and tying into the ground circuit.
you face one fan "up" and the second "down" thereby creating strong air
circulation. **
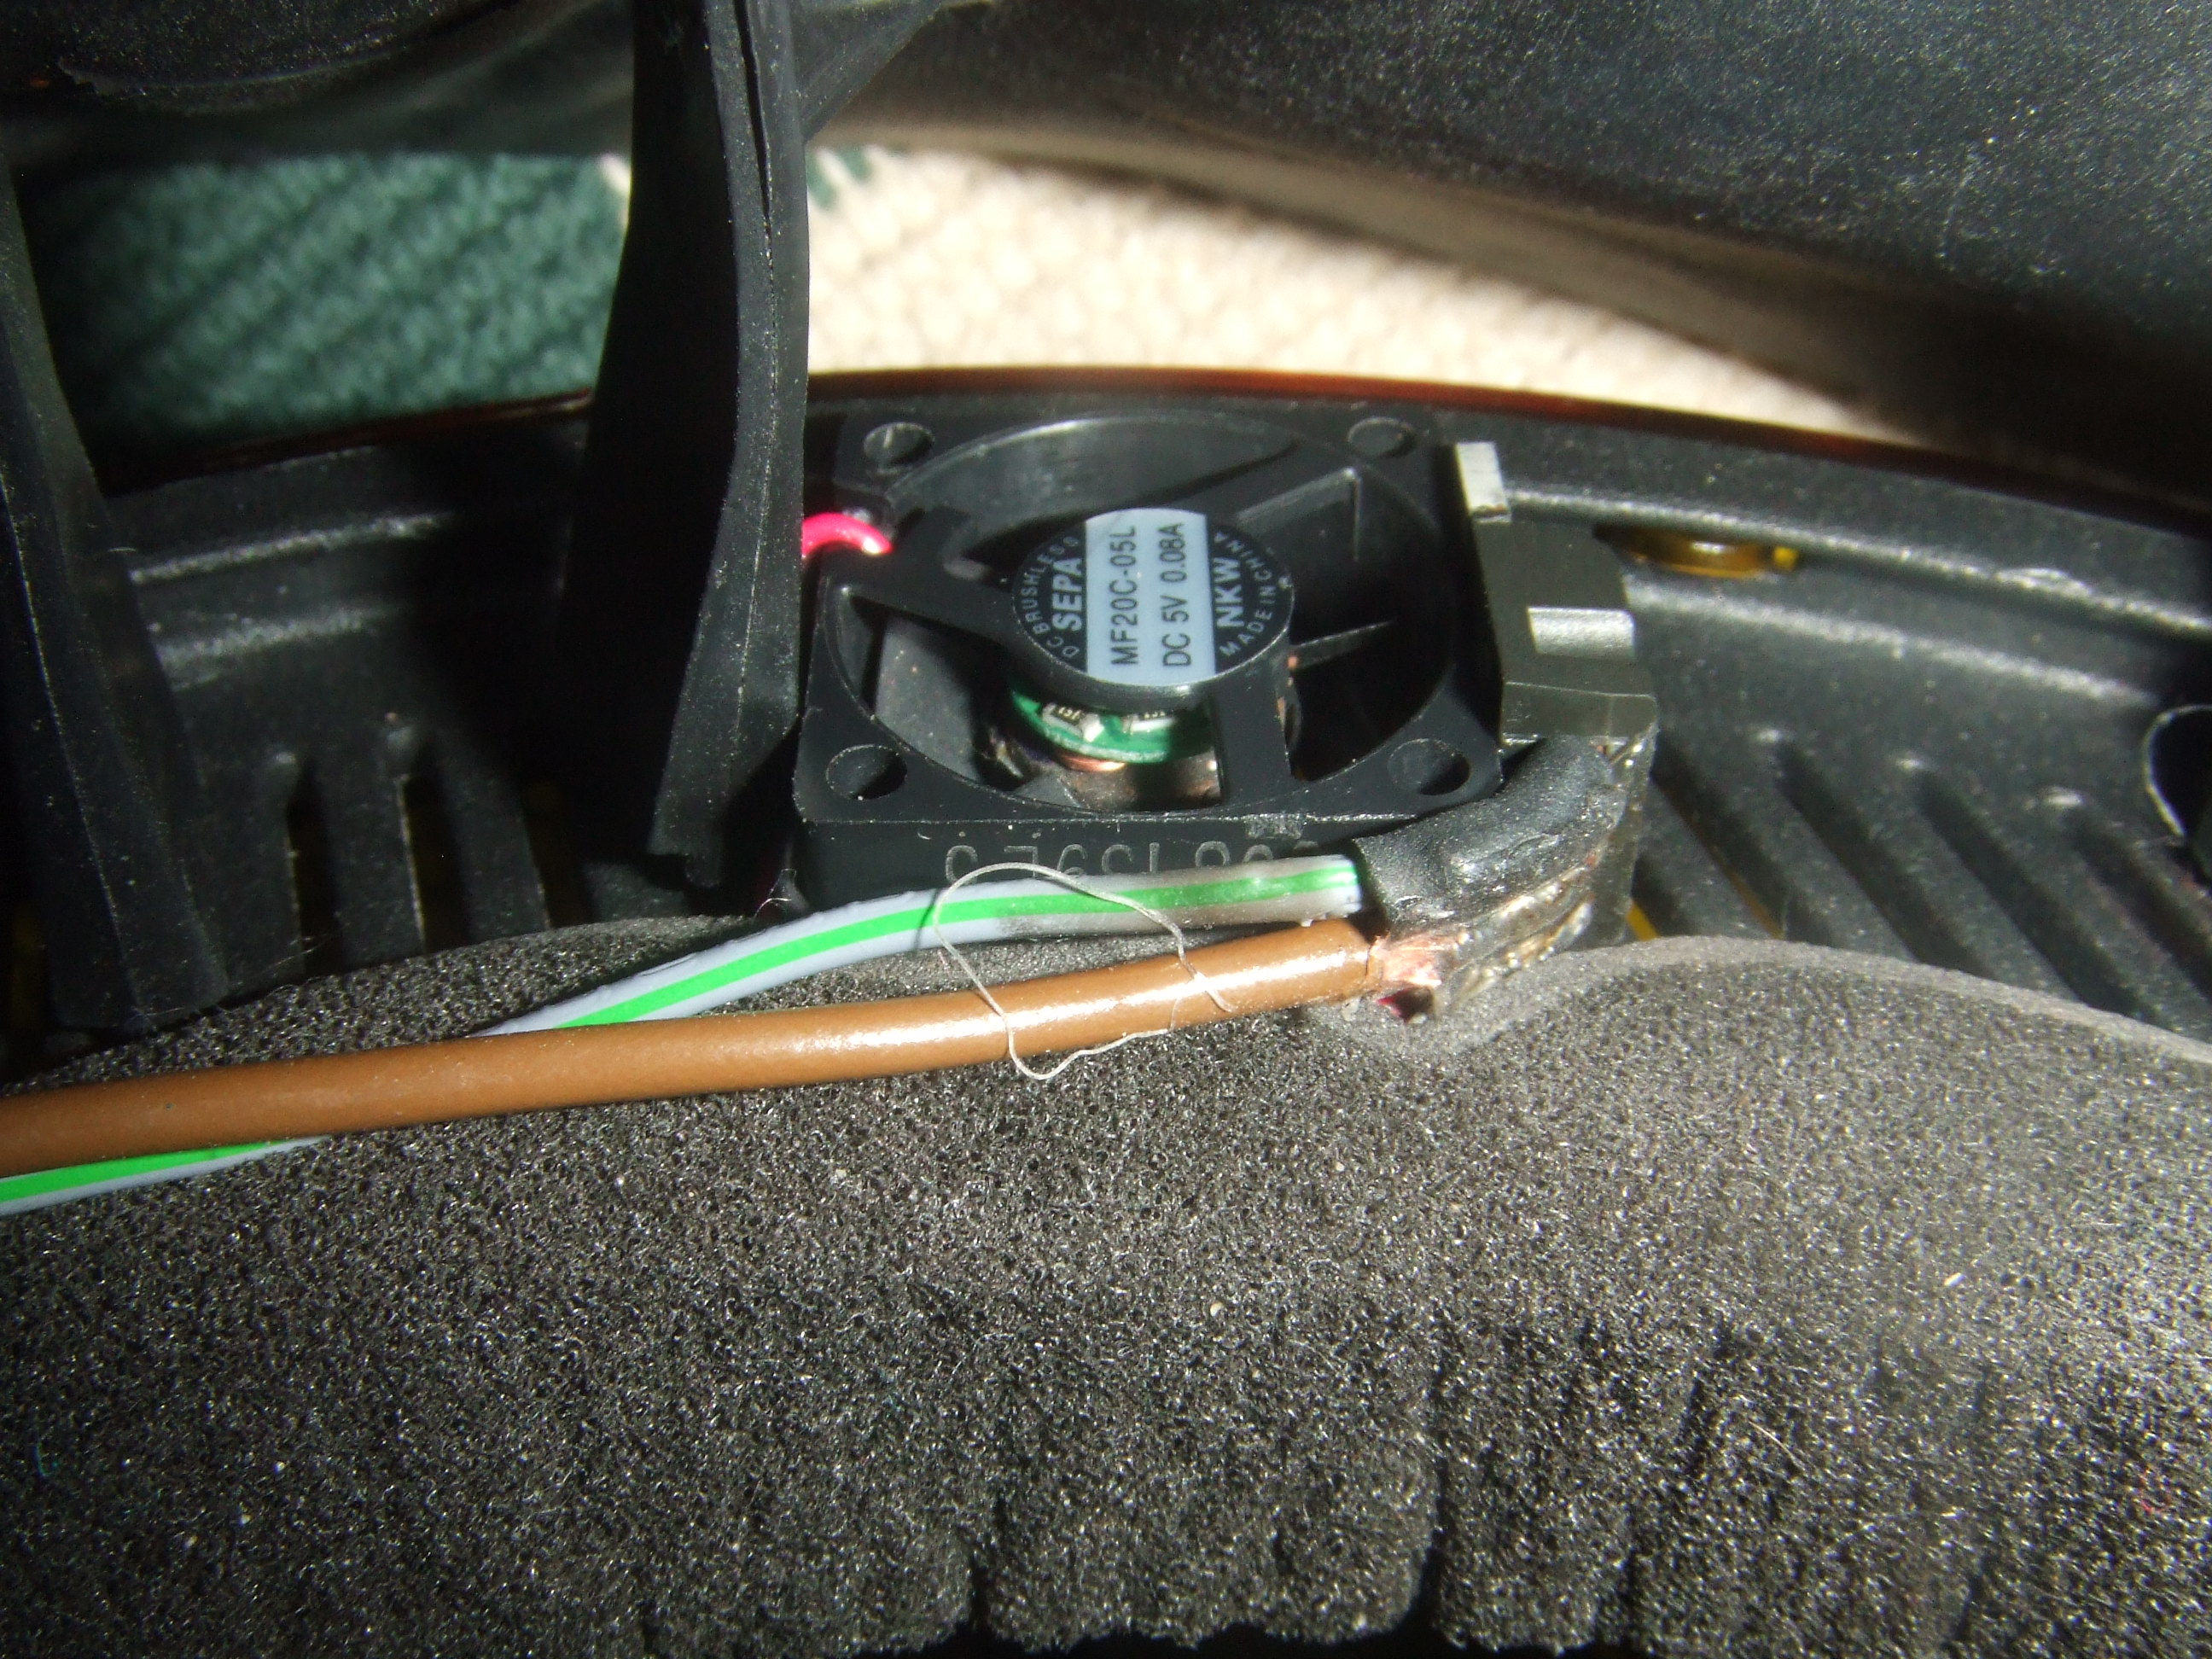
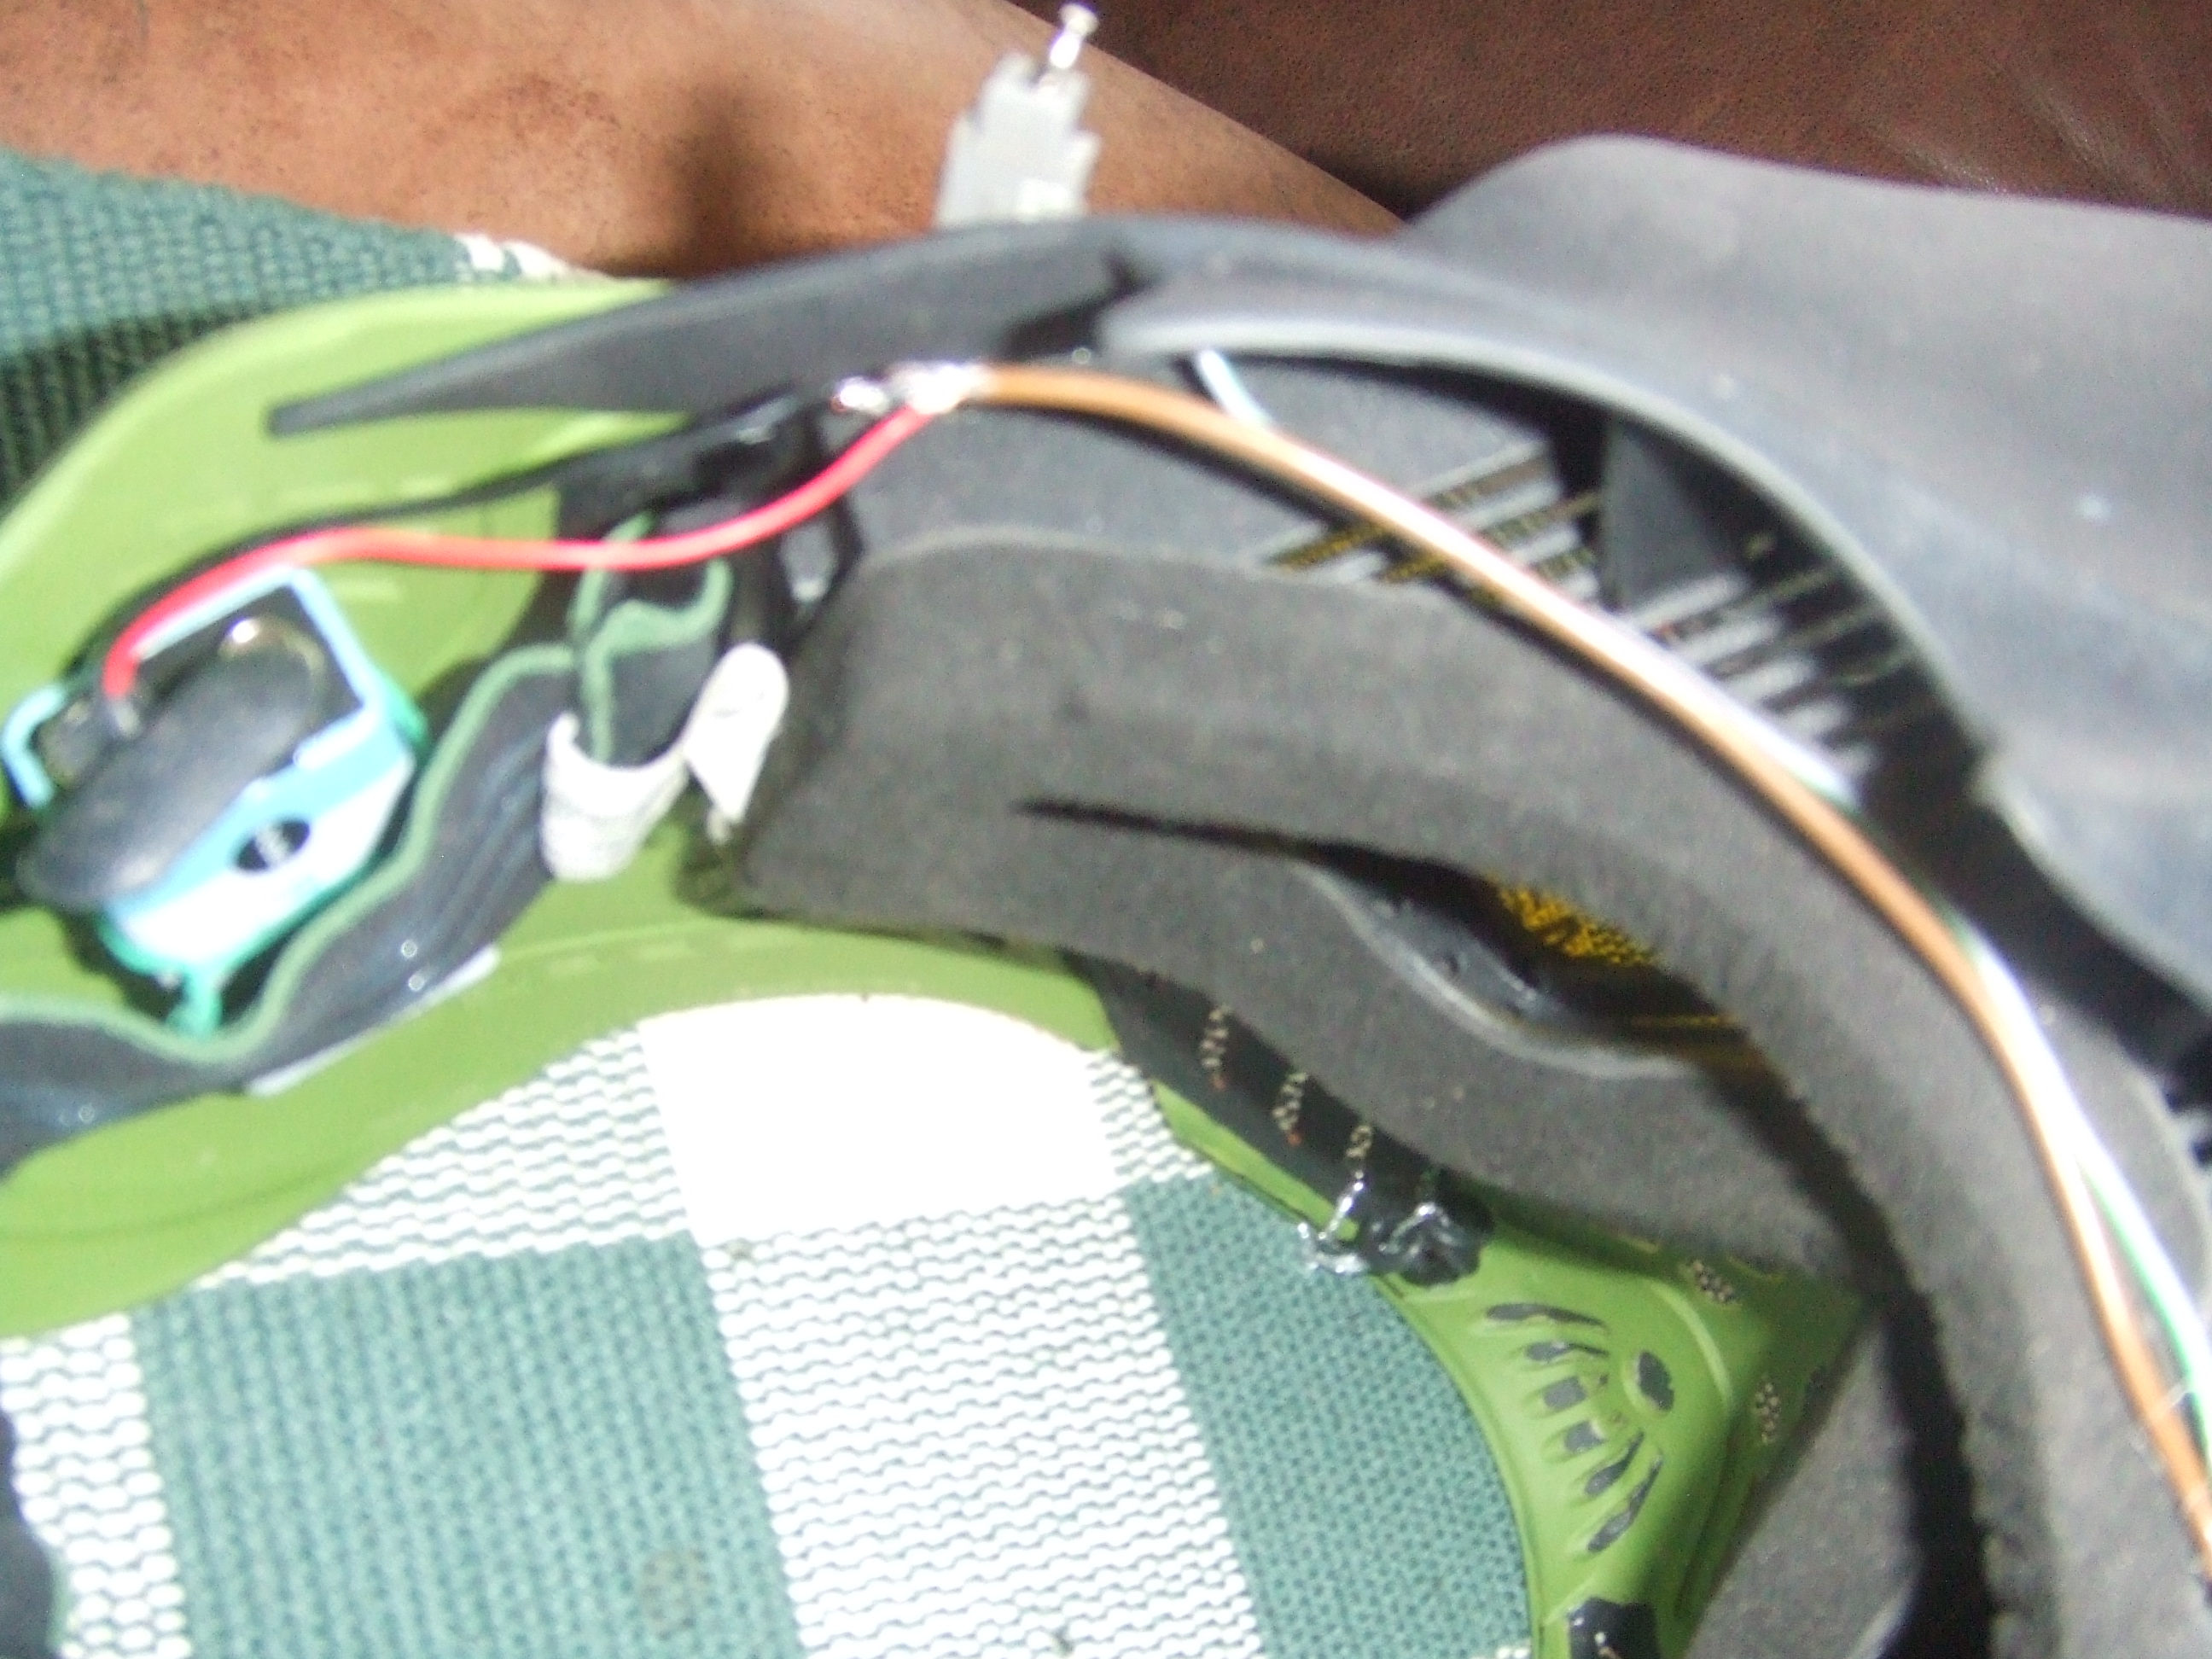
With these basics in place, all thats left is to decide where your components
will go and how to run your wires. here are some pictures of a mask I added fans
too:
Other Factors:
In the end result, you want to ensure all of your connection points are either
heat shrink tubing used, electrical taped or otherwise insulated so the system
doesn't short out or shock you. remember, this setup is designed to remove
moisture from your goggles, things are going to get wet on occasion.
There are several methods of securing the fan to the mask, you can use small
"zip" ties, nailing wire, or silicone. I chose silicone as it secures well once
dry, and can be removed without damaging the surface if needed, but most
importantly it acts as a sound absorbing cushion. even small fans can buzz
annoyingly, the old JT fans could actually give your position away they were so
loud sometimes. the newer fans are almost silent, but you also dont want them
vibrating in your mask.
My switch is makeshift, when i find switches I like better, i will secure them
to the mask or visor, right now they flop around since these are prototypes and
not designed to be pretty.
The fan can go INSIDE the mask as well, just make sure its well secured and the
wires are routed tightly so it doesn't fall out on you in the middle of the
game, or worse, injure an eye. In fact, i did this on a Vforce shield, as there
was more room to work with inside the goggle frame than outside it.
If you've been tracking, my expense
per mask is under $9.00.
All in all its a relatively simple project ,
even for the beginner. The biggest hurdle will be connecting all this
stuff together and getting it to stay connected. You may need to learn
to solder wires together and use heat shrink. There are 100's of you
tubes and other sources for this stuff. You may want to a wire
disconnect to more easily remove the system for cleaning or you
can even buy your own micro humidity sensor or set up a reversing
circuit, or even a timer so it only runs for a few minutes. There is all sort of potential, but the basic set up as above will get
you started and keep your goggles fog free. just don't forget to turn it
on (and off! )


QE9s3HF451BRir0zfU6g~~60_35.JPG)